With a new season upon us, I’m itching to get out and enjoy the warm weather. And since I have kids, that means that every summer project has to be kid-friendly as well. Still, being a parent doesn’t mean we have to sacrifice our creativity! We can still make some fun DIY projects (and even sneak in some learning) while spending time with the little ones. So here are a few projects that will keep your kids engaged this summer while maintaining your sanity:
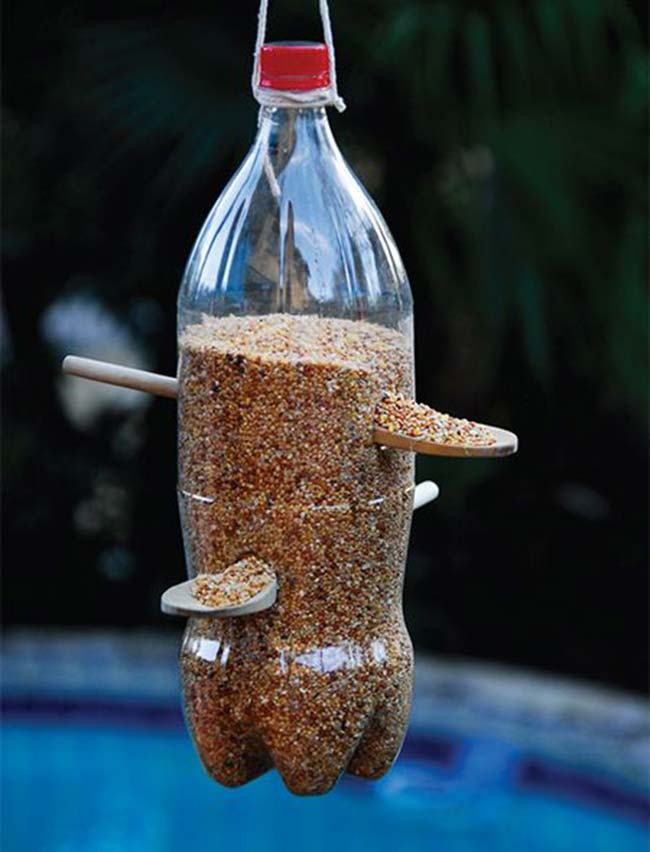
1.Make a bird feeder out of a plastic bottle.
Materials:
- plastic bottle (you can use any size)
- scissors
- tape or glue
Instructions:
- Cut a hole about 1 inch in diameter in the top of your plastic bottle by making an upside-down “T” shape with your scissors and cutting out a square from that shape. Make sure you leave enough plastic so that it doesn’t break when you push through to make the hole! You’ll need to be able to push some string through later, so think about where on your bottle will be easiest for this. It should look something like this: / \ \__/ \_____________\ / |____| |____| 2. Using the same technique as above, make another hole on one side of the bottom of your plastic bottle (but not too close!).
- You may have noticed that there’s already a little circle cut out on either side of many plastic bottles—this is where they put their logo or name/description on them when they’re made at factories! If there isn’t one already cut out, don’t worry—just cut one yourself! It should look something like this: / \_______________\___________________\______/ 3. Finally, take out some scissors and make another little “U” shaped line horizontally across both sides next to where you just made the last two holes; these lines should be around 1 cm apart from each other along both sides of your bottle (which is probably smaller than mine ;)). Take care when cutting these lines because if you go too deep into your plastic then it might break when trying to put something else through them later…
3.Make a DIY sprinkler out of PVC pipe.
- Use a drill to make two holes at each end of your PVC pipe.
- Use a saw to cut off the bottom of a water bottle, and then use pliers to pull out the plastic ring from inside.
- Use your fingers to open up both ends of your PVC pipe, making sure that they are wide enough for the bottle cap.
- Screw-in one end of your sprinkler into one hole in one side of the tube and screw on its corresponding piece (i.e., with no holes) onto it so that they can’t come apart easily when you’re spraying water everywhere!
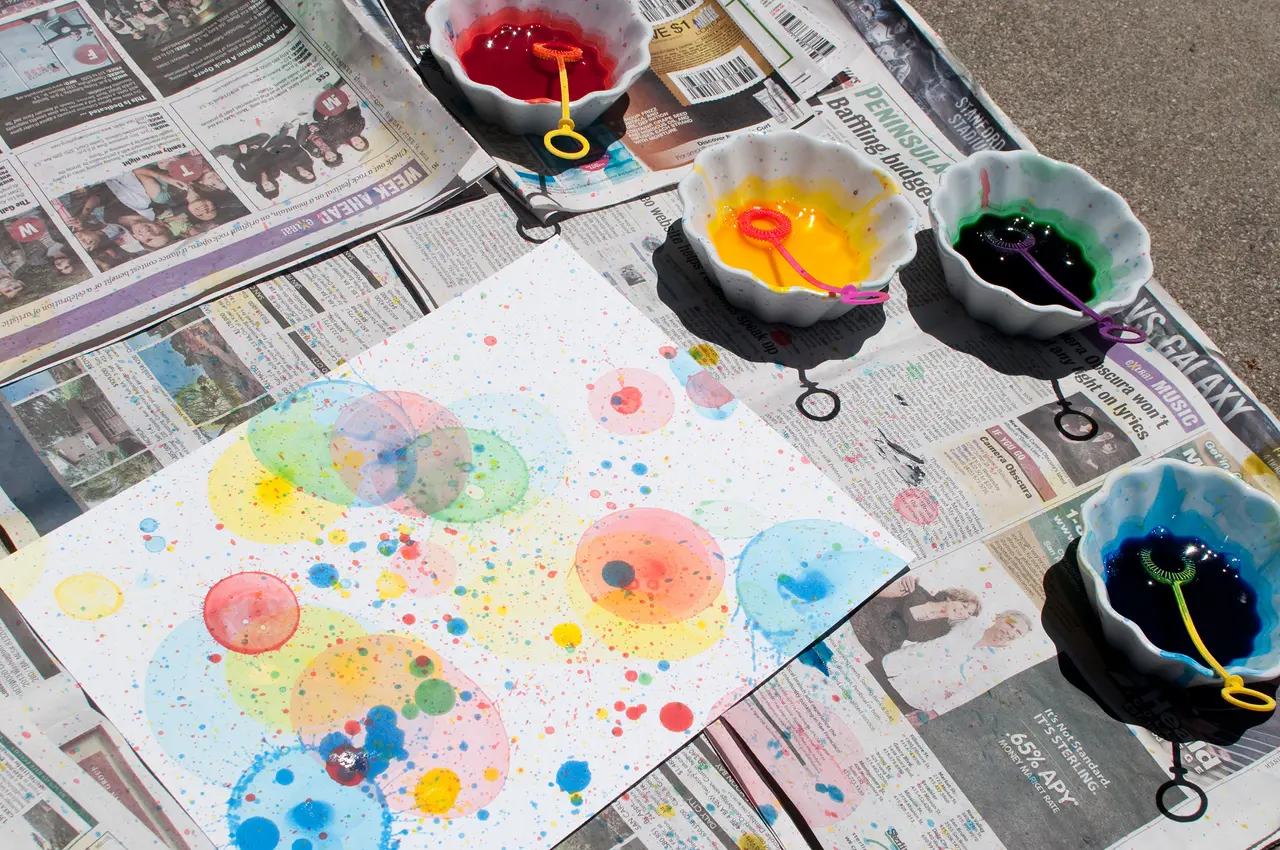
4.Blow bubbles and make some art.
- Blowing bubbles is fun.
- Bubbles are good for kids, adults, and the environment.
- Bubbles can be used to make art.
5.Create a water slide using trash bags.
To create a water slide, you’ll need a large plastic sheet (like the kind used for covering picnic tables) and two smaller plastic sheets (like those used for covering chairs). If you have a large trash bag around, that can be used instead.
Place the small plastic sheets over one another and wrap them in an extra-large garbage bag. Take turns sliding down your new water slide!
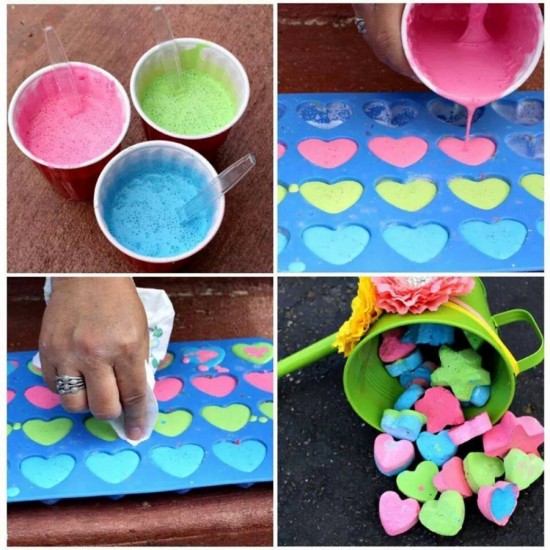
6.Whip up some homemade sidewalk chalk- it’s easy!
- Apply the glue
- Use a paintbrush to apply glue to your sidewalk, grass, driveway, or any other surface you want to draw on. We used a 3/4-inch foam brush from our local hardware store, but a smaller one would work just as well. You’ll probably want to use some old clothes too because this stuff gets everywhere!
- Spread the glue
- After you’ve applied enough glue with the brush (this will depend on how large or small your project is) get ready for step two: spreading it out evenly on the surface of your choice using either a flat spatula or paint roller if desired – both were effective at getting an even coat of white goo across our driveway and sidewalk here at home
7.Outdoor chalk art provides hours of family fun.
Outdoor chalk art provides hours of family fun. It’s easy to find and use, and it won’t damage your home or yard. What’s more, you can use chalk for almost any surface—grass, concrete sidewalk, driveway…you name it! Chalk is also easy to clean up: just sweep away the excess with a broom or hose down the area after use. You can even make your own chalk from scratch by mixing one part cornstarch with three parts water in a bucket (just add food coloring).
Once you’ve made enough for everyone in your household to have their fill at least once during summer break, store them in an airtight container until needed again next year. Finally: if you want some help making it look good this time around so that when school starts back up again next fall everyone remembers how much fun they had while being outside together doing something educational without having any idea what else was going on around them…
I need to get out more with my kids.
You need to get out more with your kids. Summer is the perfect time to plan fun activities that will be both memorable and educational. Here are five great ways to do just that:
- Take them hiking or camping in a national park near you.
- Go to an amusement park together, like Cedar Point or Disney World! Make sure your kids know what rides have height requirements before going — I was surprised when my kid wasn’t tall enough for Space Mountain at Disney World’s Magic Kingdom (he was 3 years old).
- Learn about insects by letting them catch bugs outside, then display them on a piece of paper for everyone else in the family members to see when they come home from work!
It may seem like a lot of work to organize one of these projects with our children at first, but when we see their faces light up and hear their laughter, we will realize how easy it is to make a difference in their lives while they are learning important skills. A fun outdoor project is just what the family needs after being cooped up inside all winter long!


These are very cute ideas! Thank you for sharing!